
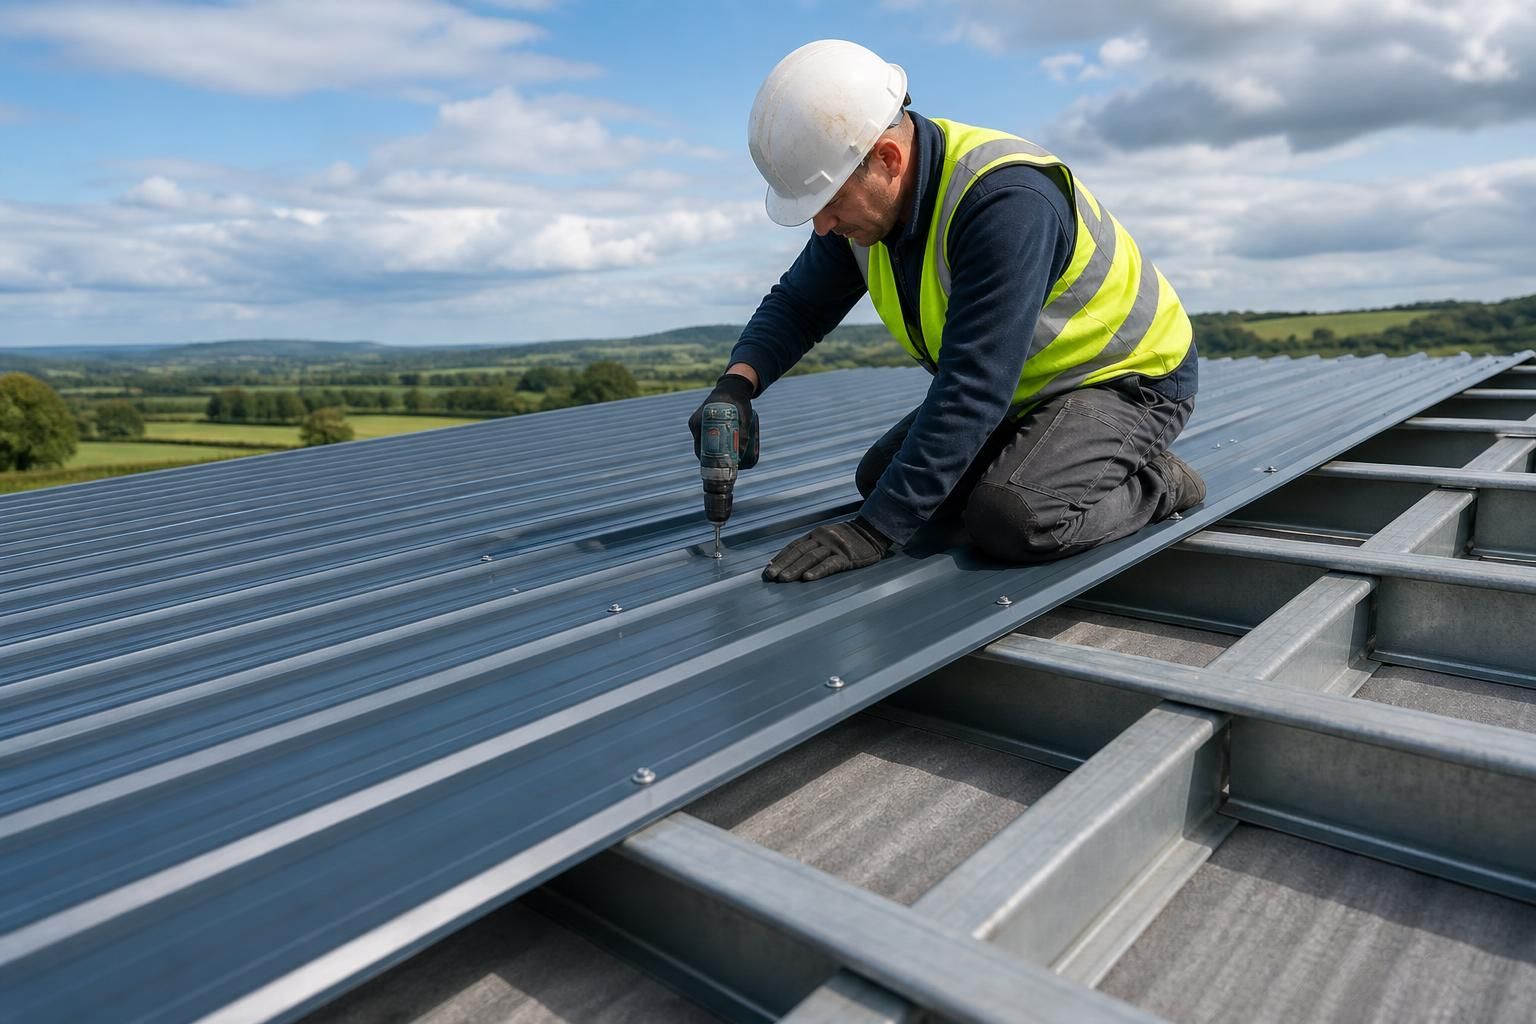
How are steel roofing sheets fixed to a building?
Steel roofing sheets are fixed to the building’s purlins or other supporting members using self-drilling roofing screws with sealing washers. Sheets are laid with the specified side and end laps, then secured through the sheet profile into the steelwork to create a stable, weather-resistant roof covering.
The fixing method must suit the roofing profile, supporting steelwork and complete roof build-up. A secure installation depends on accurately positioned supports, correctly selected fasteners, even tightening and properly formed perimeter details. The sheet manufacturer’s installation instructions and the building’s structural drawings should take precedence where they specify different requirements.
Prepare the supporting structure. Before laying the sheets, check that the purlins are correctly spaced, aligned and securely connected. Uneven or twisted supports can prevent the sheets from seating properly and may place excessive strain on the fasteners. Remove swarf, oil and debris from the steelwork, and confirm that any insulation, liner or spacer system is installed in the sequence required for the roof design.
Position the first sheet carefully. The first sheet establishes the alignment of the whole roof, so it should be set square to the eaves and checked against the verge before permanent fixing. Sheets are normally installed progressively across the roof, with each one aligned to the preceding sheet rather than allowing errors to accumulate. Temporary clamps may assist positioning, but they should not replace the specified permanent fixings.
Use the correct fastener and fixing position. Roofing screws must be compatible with the sheet coating, the thickness of the supporting steel and the site environment. Their length must allow adequate penetration into the support without causing an obstruction within the roof build-up. Depending on the profile, the fixing may be placed through the crest or another designated part of the sheet. The screw should be driven perpendicular to the sheet so that the sealing washer sits evenly and forms a seal without being distorted.
Over-tightening can crush the profile or damage the washer, while insufficient tightening may leave the joint vulnerable to movement and water entry. Power tools should therefore be used with an appropriate depth or torque setting, and each fixing should be checked visually. A washer that is split, visibly distorted or not seated against the sheet should be replaced rather than relied upon.
Form the sheet joints correctly. Side laps must be kept tight and fixed with the type and spacing specified for the profile. Where stitching screws are required, they connect the overlapping sheets rather than substituting for the main fixings into the supports. End laps should occur over a suitable support, with the specified overlap length and any required sealing tape or sealant applied continuously and cleanly. Sealant should be compatible with the sheet coating and used only where the roof specification calls for it.
Complete the perimeter details. Ridge, verge, eaves and junction trims are fixed as part of the roofing system, not added as purely decorative pieces. Their position must allow water to discharge correctly while maintaining the required closure against wind-driven rain, birds and debris. Profile fillers or closures may be needed beneath certain trims, and their use depends on the sheet profile and the roof design.
When sheets need trimming, use a method recommended for coated steel, such as suitable shears or a nibbler. Remove all swarf immediately, because loose metal particles can rust on the coating and stain the roof. Exposed cut edges should be treated with a compatible touch-up coating where the manufacturer specifies this, and sheets should not be dragged across one another during handling.
For roofs incorporating insulation, a liner or an anti-condensation layer, the fixing arrangement must accommodate the additional thickness without crushing the materials or reducing the fastener’s engagement with the support. This is particularly important where spacer systems or built-up roof assemblies are used, because the sheet, spacer and purlin must work together as a designed system.
Before the installation is considered complete, inspect the roof for missing or poorly seated fixings, damaged washers, open laps, loose swarf and misaligned trims. Any damaged coating or sheet should be dealt with in accordance with the product instructions. On a bespoke steel-framed building, the roofing layout and fixing pattern should also be checked against the fabrication and structural drawings rather than determined solely from the appearance of the finished sheets.
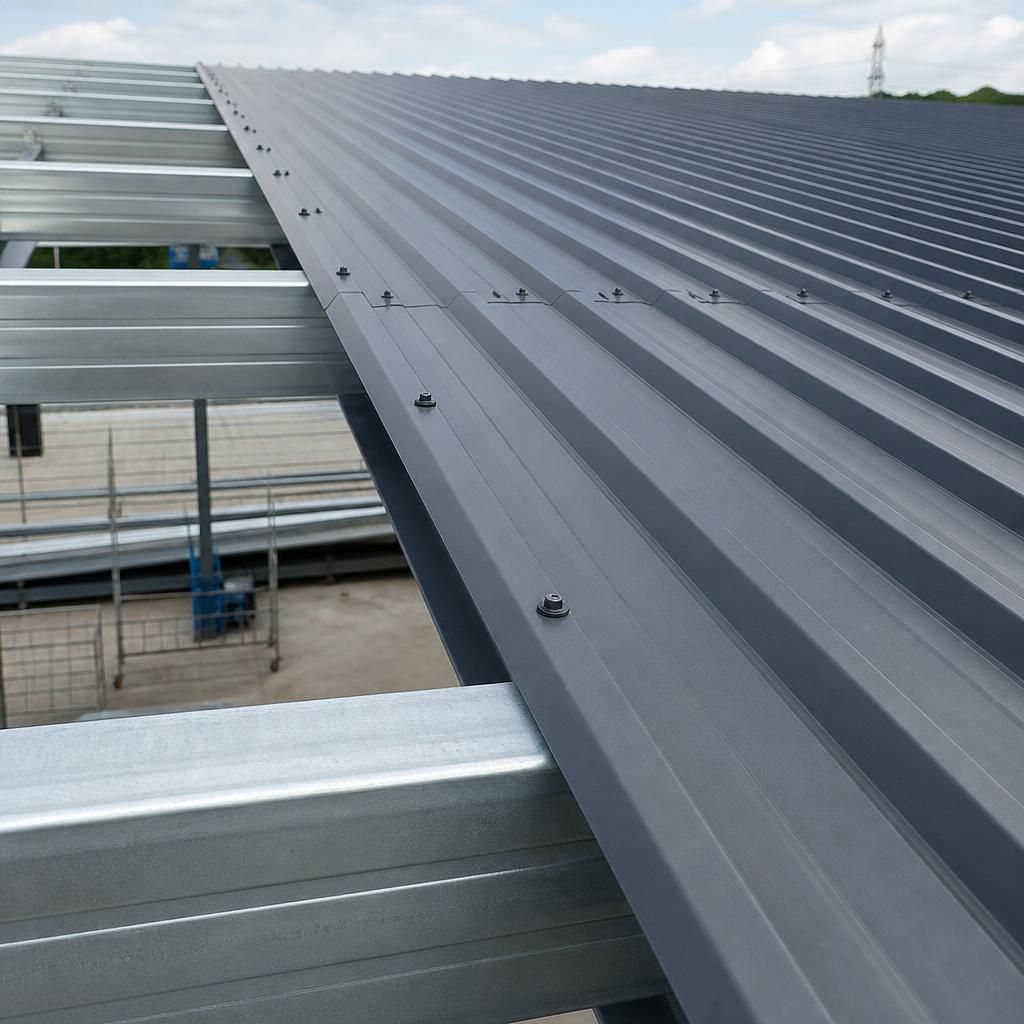
The fixing pattern transfers wind uplift and other roof loads from the steel roofing sheets into the purlins and, ultimately, the building’s frame. It is therefore a structural part of the roof design rather than a layout chosen only for appearance.
Fixing requirements can vary across the roof. Areas near verges, eaves, ridges and corners may experience greater wind effects than the central roof area, so the structural design may call for different fixing positions or closer spacing in those zones. The sheet span, profile, purlin arrangement and site exposure all influence the required pattern.
For this reason, installers should follow the fixing schedule issued for the specific building and avoid adding or omitting screws without checking the design. A visually neat roof can still be inadequately fixed if the fasteners do not provide the required load path into the supporting steelwork.
Discuss your steel roofing sheet fixing requirements
If you are planning a steel-framed building and need to confirm how its roofing sheets should be fixed, discuss the roof design and fixing requirements with Buildings UK Ltd. Their team can review the proposed building details and advise on a suitable specification.